Способы оплаты.
Оплата по безналичному расчету производиться в кассе любого банка или с расчетного счета Вашей фирмы.Способы доставки:
1. Доставка в отделения Национальных компаний-перевозчиков по всей Украине национальными компаниями-перевозчиками Новая Почта, Delivery.More:
Используя сервис компаний-перевозчиков, Вы можете получить товар даже в самых отдаленных уголках Украины. В среднем, доставка занимает 2-3 дня, во время заказа наши менеджеры согласуют с Вами дату доставки перед отправкой товара. Стоимость доставки товаров рассчитывается индивидуально исходя из обьема заказа и места доставки. 2. Самовывоз из складов пердставительств Альта-Профиль в городах: Бровары, Сумы, Тернополь, Львов, Одесса, Харьков, Винница,More:
Самовывоз возможен с понедельника по пятницу с 9.00 до 18.00, после согласования заказа с менеджером. Оплата: безналичная. Кроме того, в представительствах Альта-Профиль Вы можете наглядно ознакомиться с продукцией и получить дополнительную консультацию по подбору и монтажу водосточных систем. 3. Самовывоз либо специальные условия доставки от наших ДИЛЛЕРОВ в регионах

DESCRIPTION:
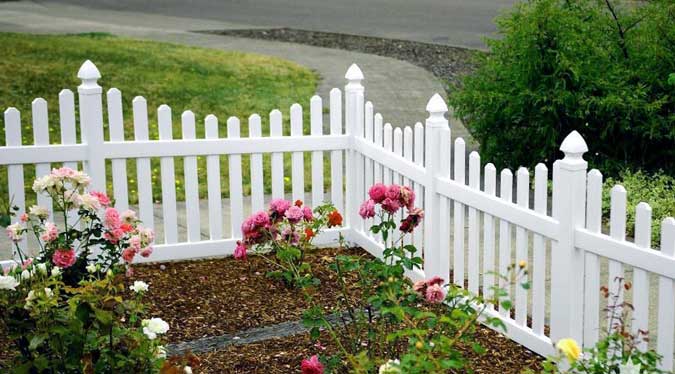
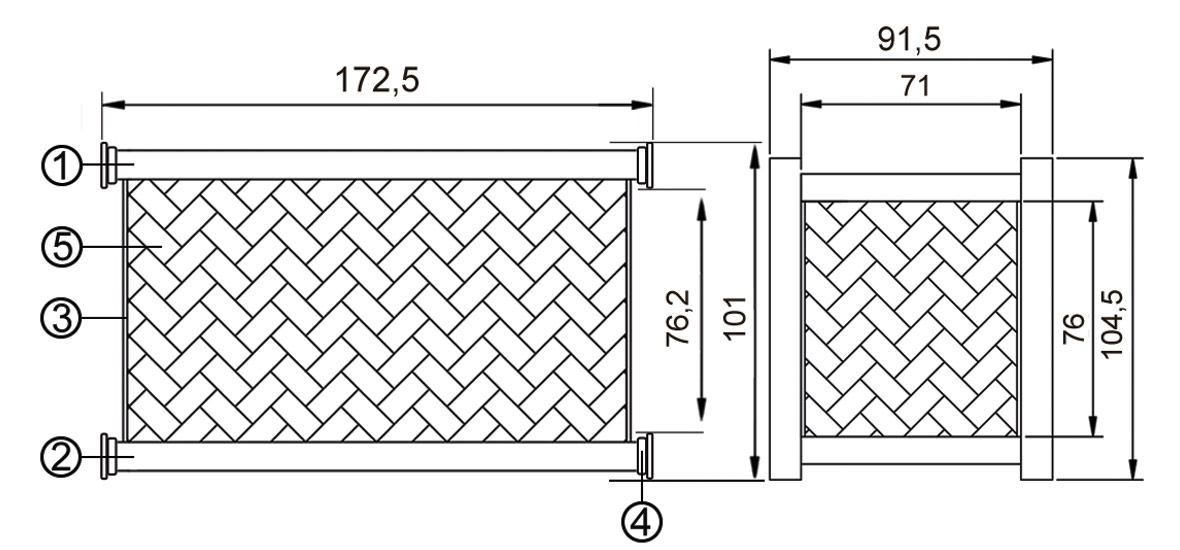
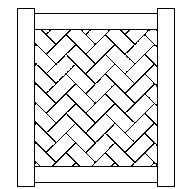
Lattice fence section, height - 101 cm
SECTION SIZE WITHOUT PILLARS:
101х172,5х5 cm
SECTION SIZE WITH ONE PILLAR:
101х183х5 cm
PRICE: out of stock


(Русский) Стандартная комплектация:
1. Прогон верхний (172,5см) - 1 шт;
2. Прогон нижний (172,5см) - 1 шт;
3. Планка U-groove (81,26 см) - 2 шт.
4. брекеты для крепления прогонов - 4 шт;
5. Секция латик - 1 шт.
Алюминиевая вставка в верхней прогон (172,72 см) - 1 шт.
Шурупы - 25 шт.
Заглушки к брикетам- 16 шт
(Русский) Дополнительная комплектация:
- столб для вкапывания - 167,5 см
- столб на поверхность -
110 см
- заглушка столба Flat
- заглушка столба Gothic
- алюминиевая вставка столба
- декоративный элемент для столба
- металлическая круглая пятка
- засов для ворот
- навесы для калитки
- замок для калитки
- светильник на солнечных батареях для столбов
- калитка
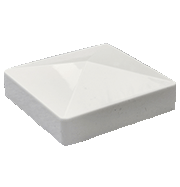
Flat plug for the pillar, h-3 cm
Closes top hole in pole. Prevents ingress of foreign elements into structure.
Gothic plug for the pillar, h-21 cm
Original post hole plug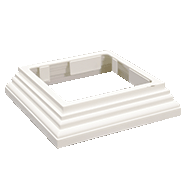
Decorative pillar element
Hides the lower part of the mount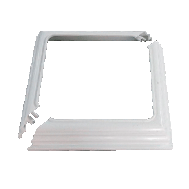
Decorative pillar element, folding
Hides the lower part of the mount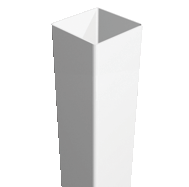
Pillar 168 cm
For digging in the ground, with the following collections: FAZENDA, LATTICE, VILLA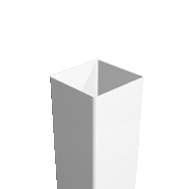
Pillar 110 cm
For mounting on the surface, with the following collections: FAZENDA, LATTICE, VILLA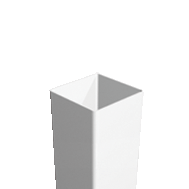
Pillar 68.58 cm
For mounting on the surface, with the GARDEN collection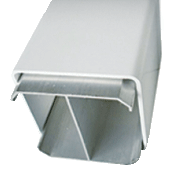
Aluminum insert
Increases pillar strength, mandatory elements when fitting a wicket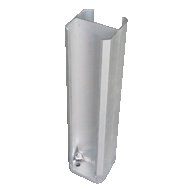
Aluminum mounting base
for the pillar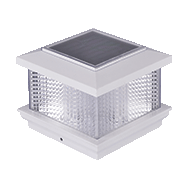
Solar plug for the pillar
Solar-powered lamp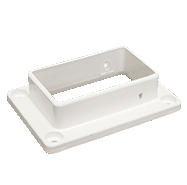
Brace for board fastening
included into the section set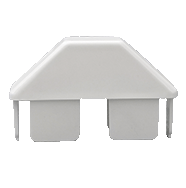
Plug stools
included into the section set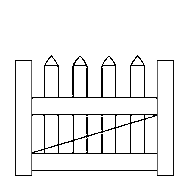
Wicket gate GARDEN

Wicket gate FAZENDA
Wicket gate LATTICE

Wicket gate VILLA
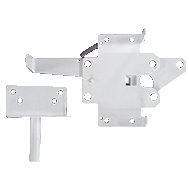
Bolt lock
White metal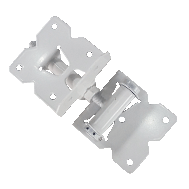
Canopies
White metal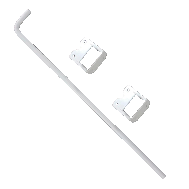
Gate bolt
White metal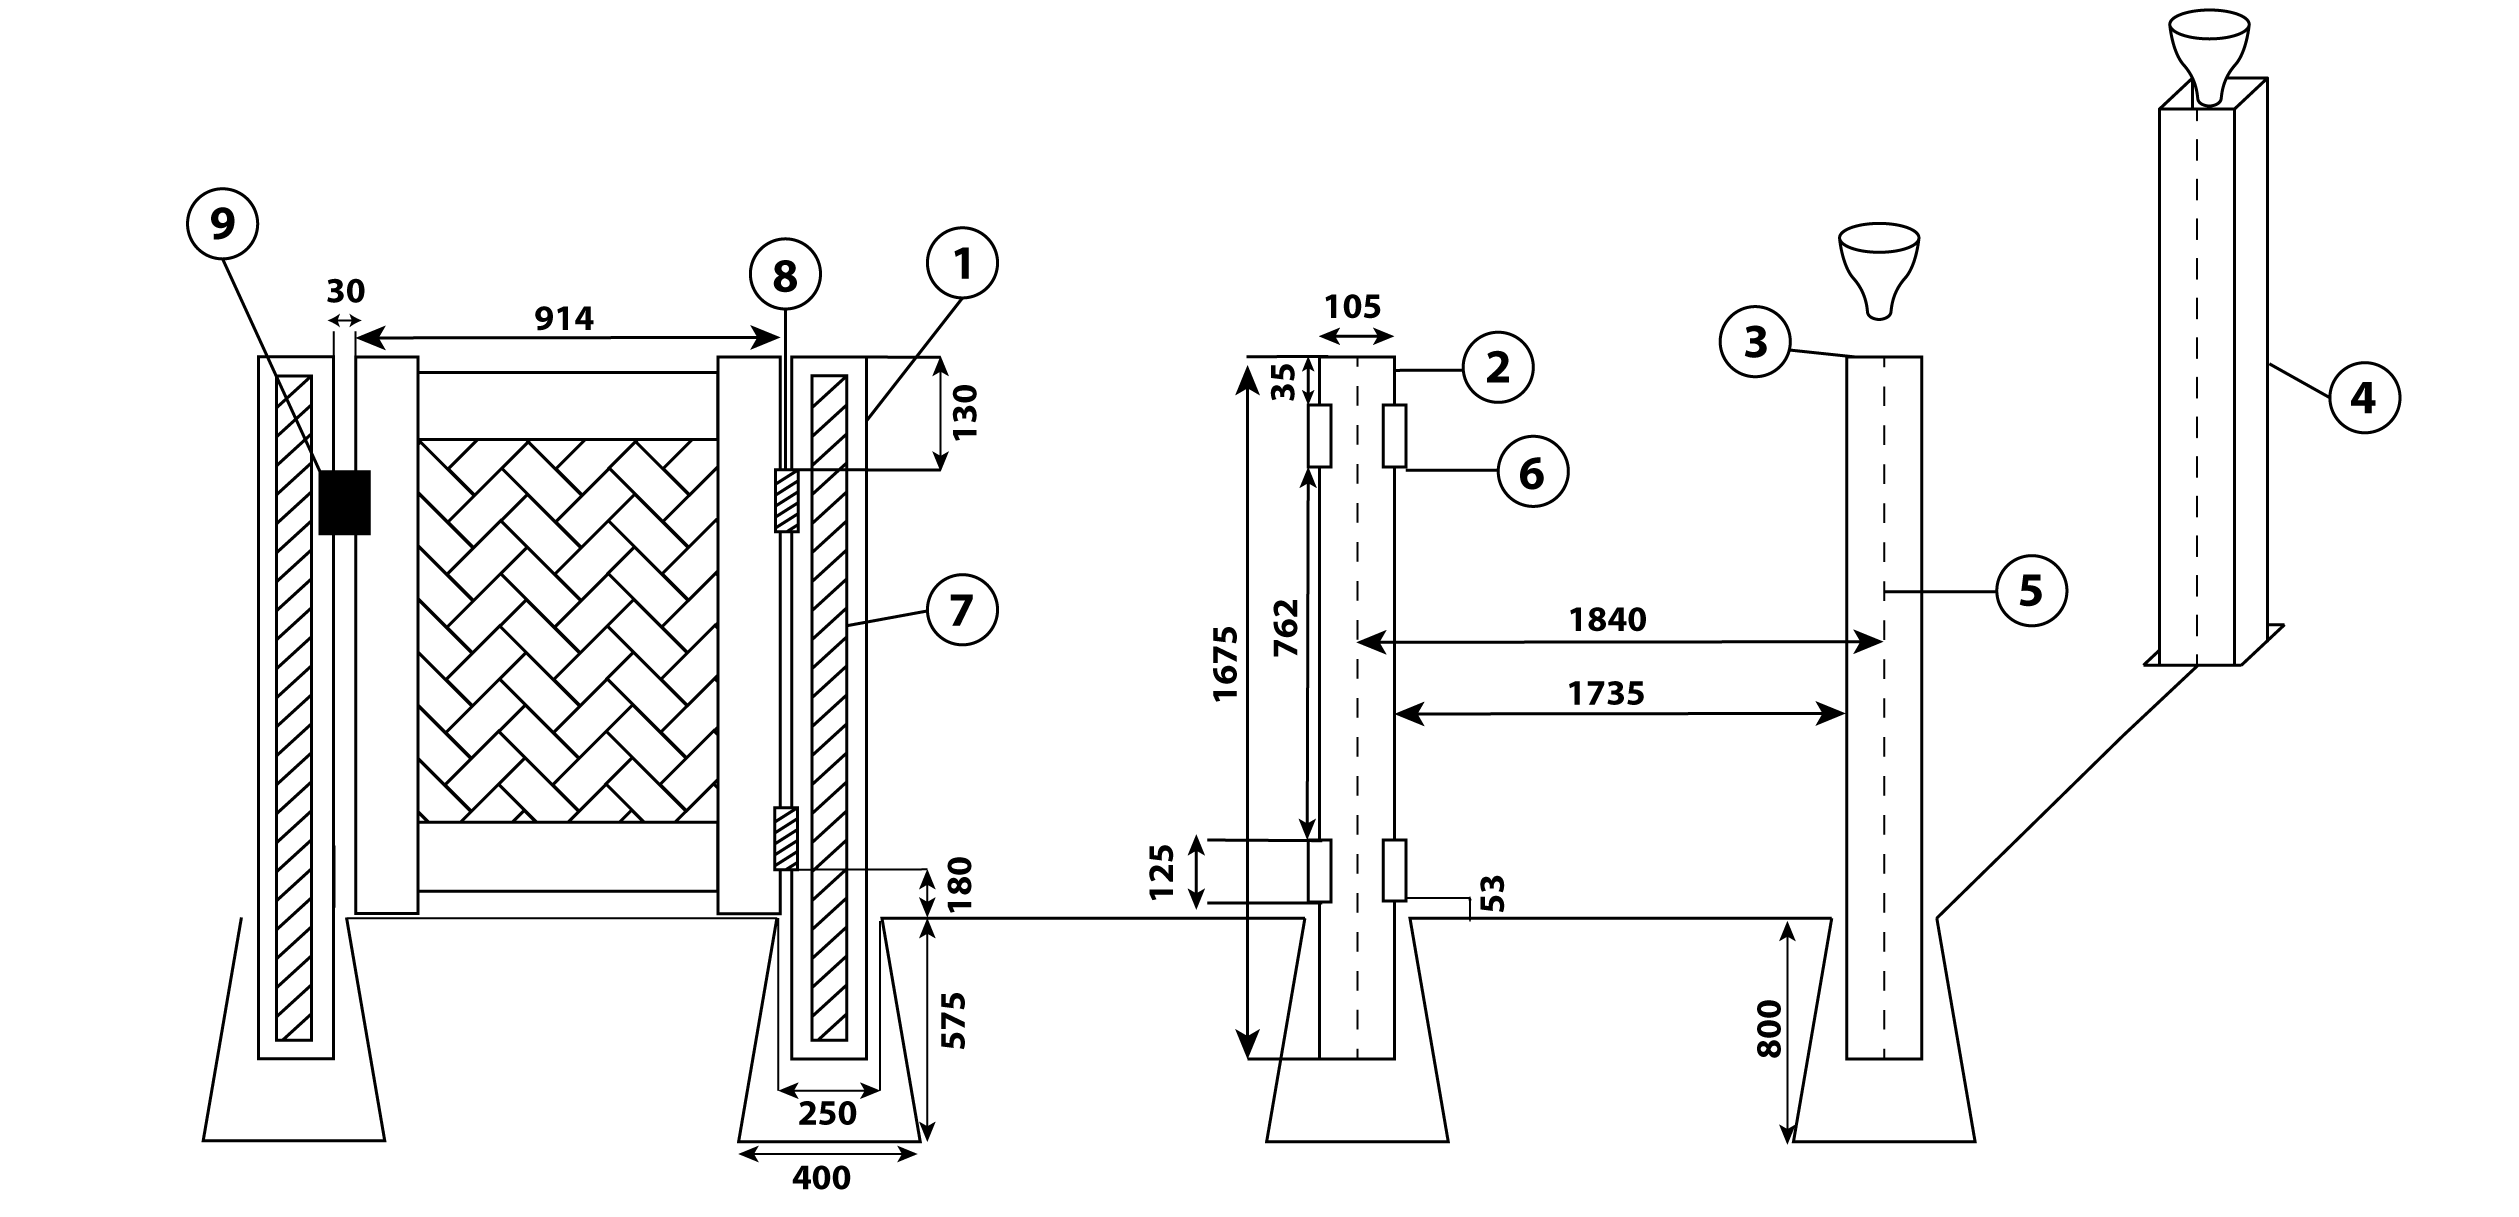
1 – Pillar for mounting gate. High 167,5 cm
2 –Line pillar. High 167,5 cm
3-Corner pillar. High 167,5 cm
4-End pillar. High 167,5 cm
5-Pillar axis
6- Bracket attachment points
7-Aluminium insert. High 167,5 cm
8- Canopies
9–Bolt lock
1. Dig holes for pillars, 25 cm of the diameter and 55 cm deep, with tilted walls.
2. Place 167.5 cm long end pillars into the holes, center them, and rotate them in the holes.
3. Check vertical installation with a level. The pillar’s height above the ground level should be 110 cm.
4. Pour concrete into the hole around the pillar, so that there were approximately 5 cm to the ground level. Once the concrete hardens completely, fill the remaining holes with soil.
5. Place the linear (intermediate) pillars in the holes and center them as described in step 2.
6. Fill corner and end pillars with concrete by half. Tap sides of the pillar lightly to compact the concrete.
7. Into end pillars, on which the wicket or gate will be mounted, it is necessary to insert 167.5 cm long aluminum inserts. You don’t need to fill them with concrete.
8. Put the caps on the pillars having smeared them with glue for plastic
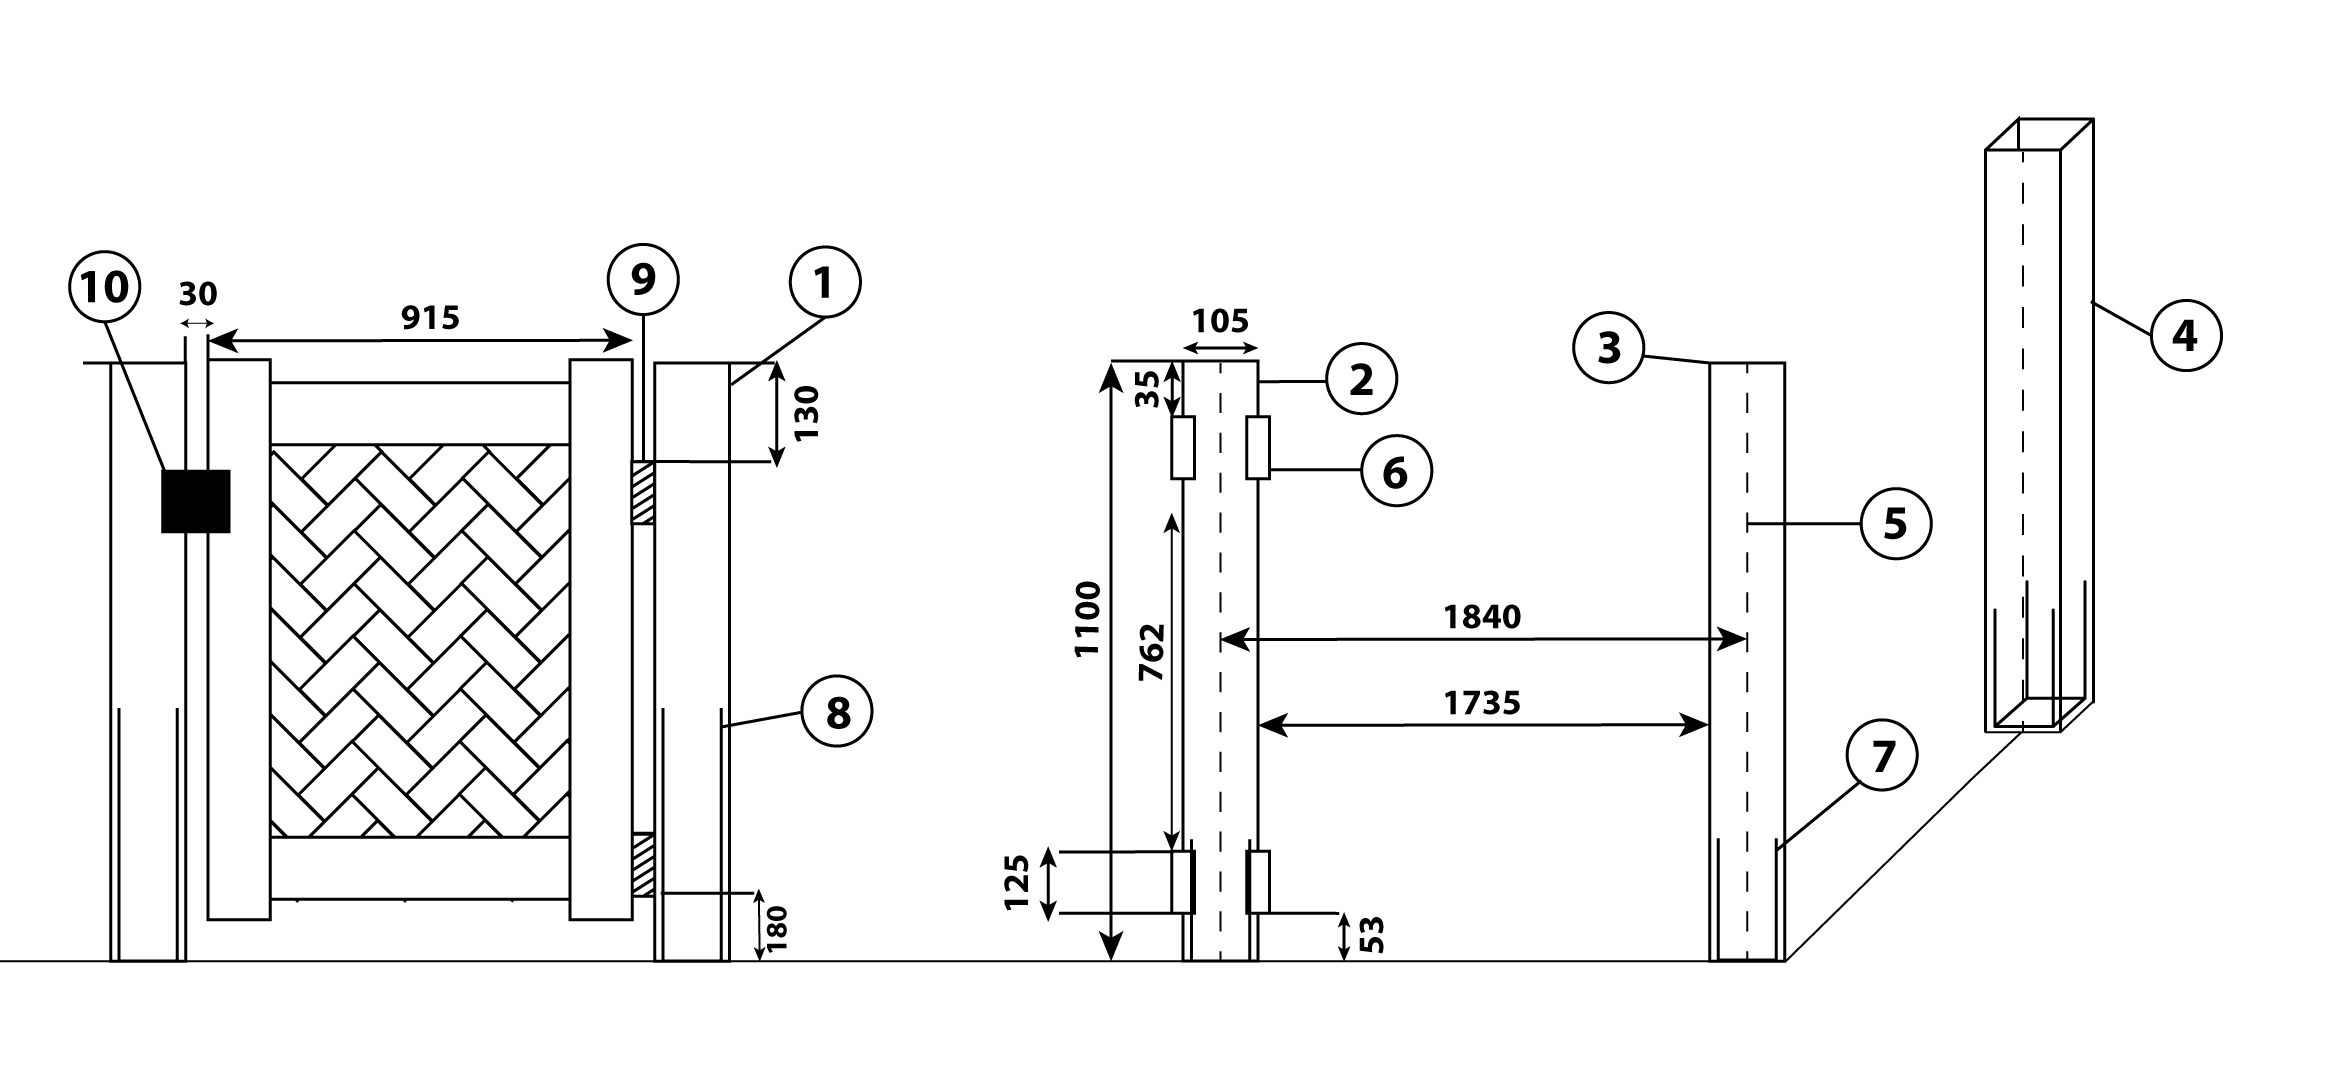
1 – Pillar for mounting gate. High 110 cm
2 –Line pillar. High 110 cm
3-Corner pillar. High 110 cm
4-End pillar. High 110 cm
5-Pillar axis
6- Bracket attachment points
7- Aluminium mounting base. High 69 cm
8- Aluminium mounting base. High 110 cm
1. Using metalware, mount the 69 cm long aluminum base on solid surface.
2. Put 110 cm long pillars on the metal base.
3. To mount end pillars, on which the wicket or gate will be mounted, you need to use a 110 cm long aluminum mounting base.
4. If necessary, put a decorative pillar element on the pillar.
5. Put the caps on the pillars having smeared them with glue for plastic.
1. Put 110 cm long pillars on the round metal toe.
2. Put the caps on the pillars having smeared them with glue.
For this type of installation, it is necessary that the distance between the existing columns is equal to the section length + 1 cm allowance for expansion / compression.
1. Mark on the pillars the place for fixing the sections.
2. Put braces on edges of the sections.
Note! Please, note that there should be a gap of 0.5 cm between the edge of the section and the edge of the bracket on the pillar side to level expansion / compression process. Such gaps should be left on the both sides of a section.
3. On the both sides of a lattice section, put on U-groove bars having covered them with PVC glue.
4. Put braces on edges of the upper section.
5. Insert the lattice section into the running sections.
6. Mount the sections to the pillars with braces.
7. Mount braces on the upper section with stainless metalware.
8. Close all metalware tops with special plugs.
1. Attach balancing units reinforced with an aluminum insert of pillars to the fence wicket.
2. To mount the gate, use two wickets.
3. A bolt latch can be attached additionally to the wicket and the pillar.
Lawn edge - is a plastic fencing. It is widely used in suburban areas for decorating and convenience of dividing the landing rows.