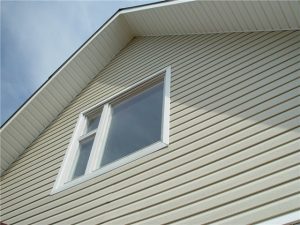
Vinyl siding is often used to sheathe the walls and gable of a private house because of its obvious advantages over many other types of finishes. So, siding is not affected by moisture and does not fade under the influence of ultraviolet radiation, does not require serious preparation of the walls or any special tools during the installation process.
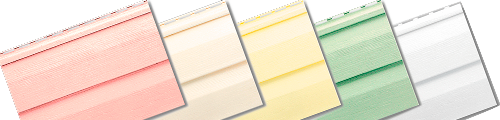
For finishing the gable, both ordinary vinyl siding and basement siding, characterized by a higher mechanical strength, are suitable. Both types of siding are available in various shapes and colors, which makes it possible to make a stylish and original cladding of the house.
Top Reasons to Choose Gable Siding
The ease of installation of this material allows you to finish it yourself and in the shortest possible time. It is relatively inexpensive, and a wide range of colors and varieties of vinyl siding will help to embody the most daring ideas for decoration.
It is known that up to 30% of heat loss in a private house occurs through the roof. To ensure thermal insulation of the roof, as well as to protect against moisture penetration, they use siding, sheathing the gables of the house with it, having previously installed a heater under it. Thus, heating costs are reduced, the house becomes aesthetically pleasing, the cladding lasts a long time and does not fade from the sun.
Siding panels are equally well suited for installation on a wide variety of surfaces, be it concrete, brick, stone or wood. And the installation technique is not much different.
Gable siding installation technology

Following the simple guidelines that will be outlined below, you can quickly and easily install siding panels on the gable.
First, you need to clean the work surface on which the installation will be made from dirt. If the pediment is made of wood, then, in addition, you need to treat it with a special impregnation that protects the wood from the formation of fungus and mold. The treated surface must dry well.
If the installation of the siding is carried out without installing the crate, the surface must be flat, with differences of no more than ten millimeters, otherwise, the sheathing may deform. In other cases, installation should be started from the lathing. It will not only help to level all the irregularities but also allow you to insulate the pediment. In houses with an attic floor, it is recommended to install a frame even on a flat surface – in order to lay insulation and make waterproofing.
Experienced experts advise using galvanized metal profiles as lathing. Firstly, they are lightweight, which means that they are easier to install, and secondly, they do not lend themselves to decay or corrosion. Thus, even at a higher price point, you will benefit from their durability and reliability.
The metal profile as a lathing is attached to special suspensions, the step between the profiles is 30-40 centimeters. If the attic floor is sheathed, a vapor barrier and insulation are placed under the cladding.
Installation of panels on the pediment
Installation should start with siding accessories. We need these varieties of them:
- outer and inner corner strip;
- starting plank;
- J profile;
- H-profile;
- soffit;
- near-window and finishing strips, if there is a window on the gable;
First, the internal corner or J-profile is installed on both roof slopes, as well as the starter bar. If there is a window on the pediment, we sheathe its opening using a finishing and near-window strip. In the case when the window has the shape of an arch, a flexible J-profile is useful, it is called that – arched.
Next, we proceed directly to the installation of panels. It is better to do all the markings and cuts in advance on the ground, and raise the ready-made planks upward. Each plank, where it will be in contact with the roof slope, will need to be cut at the slope angle, the trimmed part will be inserted into the corner profile installed at the edges and will not be visible. It will be more convenient and faster to make two templates – for the right and left sides and cut each panel according to them. We put the first panel into the starting bar, then each next panel will snap into the lock from the previous one. Connect the two panels horizontally using an H-profile.
If the pediment is triangular, the last panel will also be in the form of a triangle, it is allowed to fix it by screwing a self-tapping screw directly through the panel since there will be no mounting hole in this case. If the pediment is trapezoidal, then the cladding will be completed by installing the finishing bar.
Installation of spotlights
To install spotlights on both sides – both to the outer part of the roof and to the inner corner between the roof overhang and the gable – a J-profile is attached. Next, the soffit panel is bent and both sides are inserted into the J-profile. The panels are sequentially joined to each other using locks. On complex roofs with kinks and bends, connecting
Select and buy: